
Can you really do skywriting in a non-aerobatic airplane like my Luscombe? Yes, sort off!
Table of Contents
What is ADS-B Skywriting?
Where in traditional skywriting one uses the airplanes smoker as a pen, ADS-B Skywriting or GPS Skywriting utilizes the airplanes GPS track. In that manner ADS-B Skywriting could be seen as a subset of GPS skywriting since it uses GPS as well but also the transponder to send the track to the ground
And with that we have the most important difference for spectators. With GPS Skywriting the GPS on board the airplane records the flight and the resulting track can be downloaded and shared after landing. With ADS-B Skywriting curious people can watch the action unfold on website like Flightradar24 while you are flying.
So what is it with the aerobatic stuff?
Well, the title refers to a non-aerobatic airplane. And is absolutely true that you can use a standard category[1] airplane for that. Remember, all that matters is your track! On the other hand the FAA still sees GPS Skywriting as aerobatic maneuvers as part 91.303 points out: “[…] aerobatic flight means an intentional maneuver involving an abrupt change in an aircraft’s attitude, an abnormal attitude, or abnormal acceleration, not necessary for normal flight.”
At that point you might already see why a slow taildragger like the Luscombe or a Piper J3 might be the better choice that a fast cruiser like a Mooney or Bonanza. Depending on your design you will probably do some quite erratic maneuvering.
On the other hand, if you plan your image big enough, turn radii become less of a concern. An example is El Al’s flight 1747 on November, 3rd 2019 where thy drew a 747 with a wingspan of approximately 120nm in the Mediterranean.
How do you do it?
A word of caution first! The more complex the graphic is, the less likely it is, that you can fly it without help. So with all in aviation it comes down to planning.
In this little tutorial I will show you how draw a simple heart over my home airport. All files can be downloaded at the bottom.
Step 1: Creating the graphic
First of all we need an image we want to draw, of course. I wont describe how to use an image editing tool to create your favorite image as there are enough tutorials out there in the internet on how to work with Paint, Gimp, Inkscape or what ever you prefer.
For my graphics I usually use GIMP and for the “Discovering-Eagle.org” text it took advantage of the “Brush Script MT Italic” font by Monotype. You can download it from Dafontfree.net.
Anyway I do have some design considerations for you:
- The most important one first: Create your graphic in a way that it can be drawn with as few lines as possible. Remember, your plane will leave just one continuous trail in the sky and each time you want the line to “stop”, you have to fly back on another one to hide it.
- Create your graphic in a single color. You really can’t change the color of you GPS track. An exception might be the altitude color coding used by Flightradar24 for example. But therefore you must be even more precise in your flying! Pick a bright color you can see well on a satellite image.
- If you like to write some text, use a handwriting font as it is already designed as a more or less continuous line.
- Give your image a transparent background. This helps in the next step.
- Never save your image as JPG as that will blur the edges and we want sharp ones. Remember, we just have one pencil with one line! We won’t create any shades or what so ever.
- If you save your image in a pixel based format like PNG or GIF, create it big enough. If you make it to small, it will become blurred in the next step. As a reference: The image I used to write “Discovering-Eagle.org” is almost 900x120px big and the skywriting came out about 24nm wide and good 3nm high.
Step 2: Georeferencing the image
The next step is georeferencing the image. Therefor I like to use Google Earth which can be downloaded for free from Google.
Step 2a: Importing an airspace file
I also suggest that you download the appropriate airspace file for your region. It will help you to place your image in a way that it won’t interfere with controlled airspaces. As you might expect it can be quite challenging to get a clearance for erratic maneuvering inside a Class B, C or D airspace.
-
- Download the appropriate file for your region from Google Earth 3D Airspace of Lloyd Bailey. Just click on the country of your interest in the map or select it from the list below and you will be offered a KMZ file for download. Save it to your disk. Below the map you can also select between SUA and DAFIF. SUA has by far the more recent data but DAFIF is available in more countries. DISCLAIMER: Of course these are no official navigational data. So cross check with an official map!
- Open Google Earth. When it has started up go to
File>Open...and select the KMZ file(s) you downloaded before. -
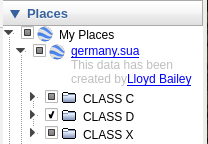
Airspace imported into My Places
On the left side of the window you will find the
Placestab and within a folder calledTemporary Places. Each KMZ you have just opened should sit in here now. To save you from opening the airspaces again and again each time you close and restart Google Earth you can now drag the folders called[countryname].suainto theMy Placesfolder of thePlacestab. - You know want to adjust which airspace class you like to see. Therefore open the
[countryname].suafolder and you find various subfolders containing all sorts of airspaces. Just tick or untick them.
Step 2b: Geotrace the image
In order to get the image in our navigation app we need to geotrace it. The essentially means that we break it down into even simpler lines and redraw it with a single trace.
-
-
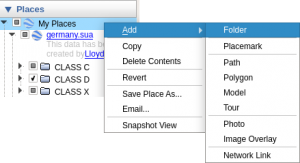
Add folder to My Places
Do a right click onto the
My Places folderand selectAdd>Folder. Name the new folder something like Skywriting Heart. -
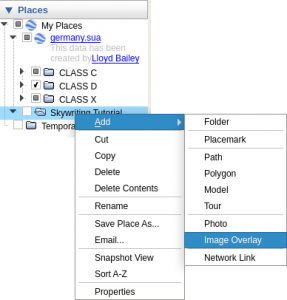
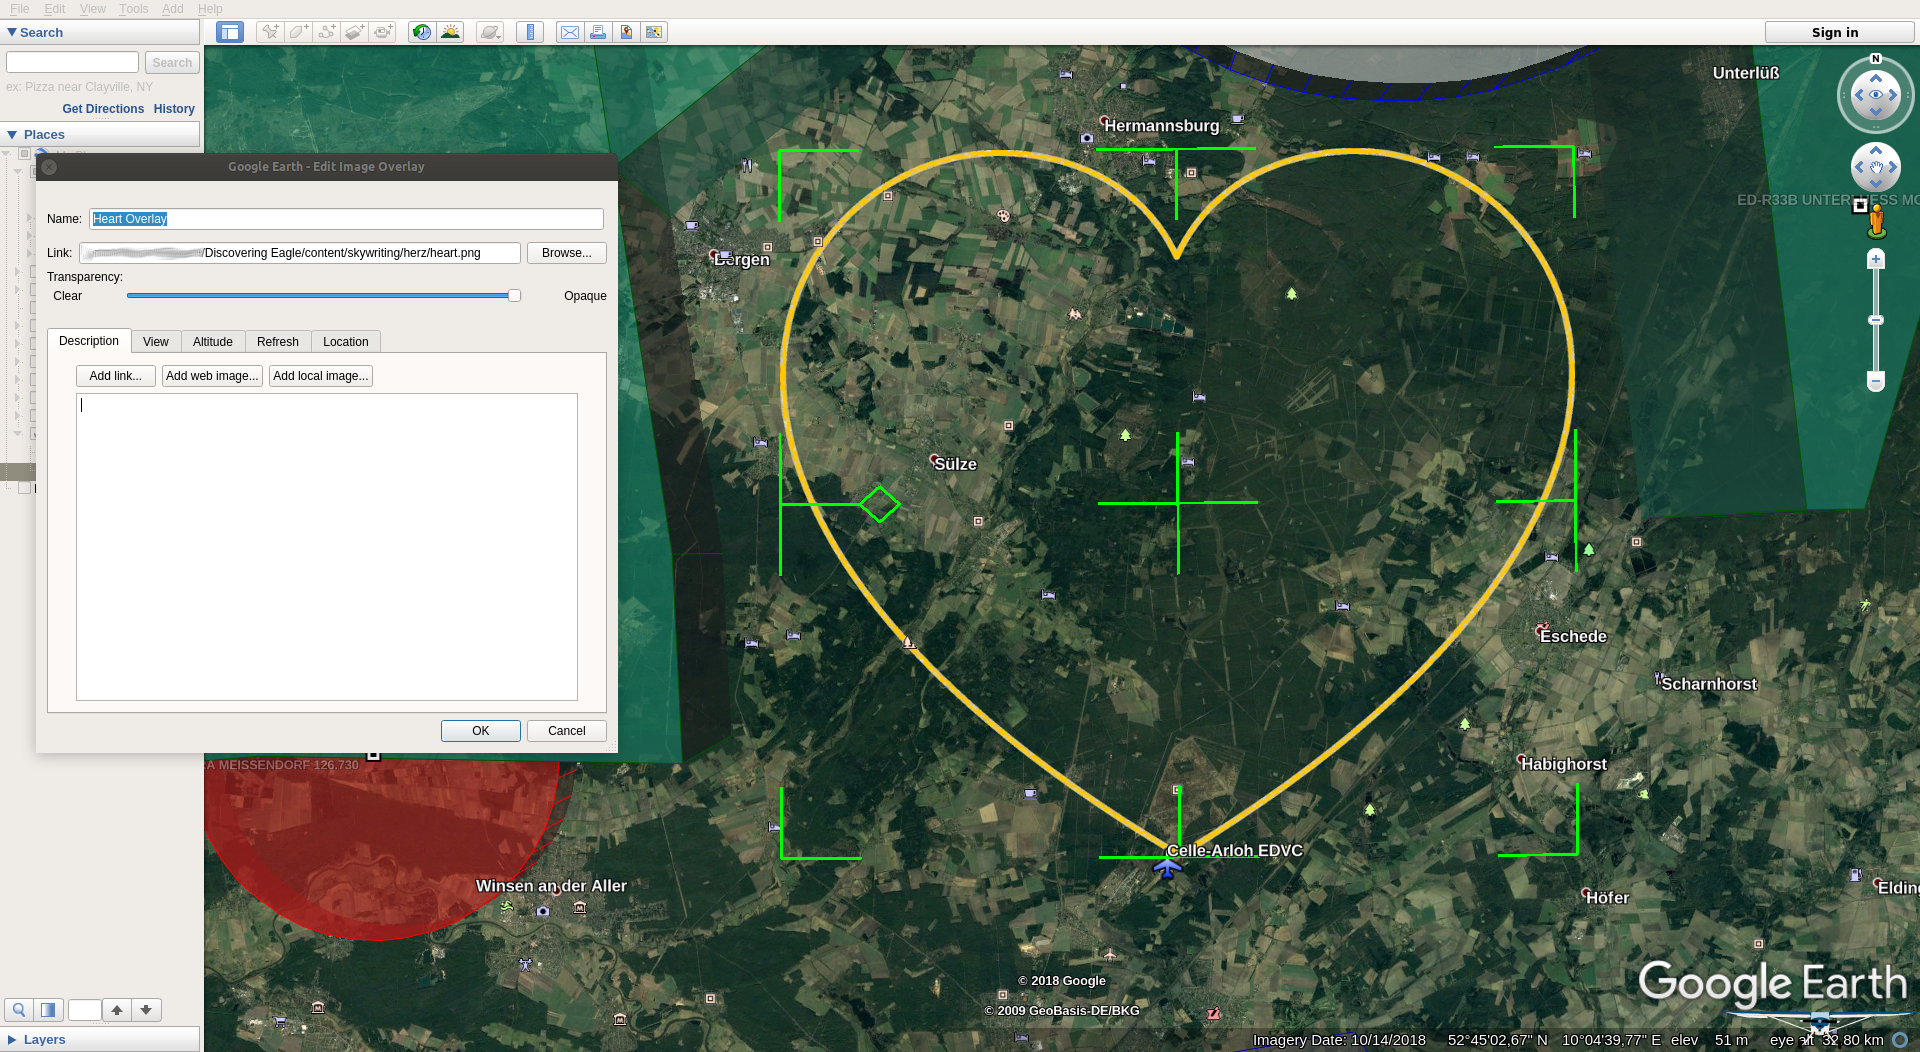
Add Image Overlay
Now do a right click on the folder you just created and select
Add>Image Overlay. Give it a fitting name and fill the path to you image from step 1 in theLinkfield. I usually adjust the transparency to full opaque. The other parameters don’t need to be touched at the moment. - With the Image Overlay window still open, you see a kind of green crosshair has appeared on the map. You can use this to adjust the image on the map.
If you click and drag the Plus in the middle you can move the entire image around.
If you drag one of the outer markings, you can resize the image. Hint: Keep the Shift key press while doing it to maintain the aspect ratio.
Last but not least with the little diamond shape on the left you can rotate the image.
Now it comes in handy to have a good resolution for the image so it doesn’t get blurred when you enlarge it. Also at this point you see the advantage of having airspaces displayed. So you can fit all nicely into each other.You see it comes in handy to have a transparent background here, too.
Positioning the Image Overlay (click to enlarge)
- Next step is to redraw the image with a Google Earth Line String. Therefore you need to find the most optimal way how to fly each line of the image at least once but not to fly too many lines more often. Obviously, with a heard this is pretty simple. But remember the “Discovering-Eagle.org” text. Draw the Line String exactly in the order in which you later want to fly the image.
Do a right click on our Skywriting folder again and selectAdd>Pathand give it a fitting name. On theStyle, ColorTab select a color with a good contrast to the satellite and Overlay Image. I found magenta working most times. Also enlarge the width to about 5. - With the Path window still open zoom in to the point of your Overlay Image were you like to start to fly it and click in there. You can move the window with the arrow keys and zoom with the mouse wheel.
- Now begin tracing the Overlay Image with additional Path points. For each point click where it should go. To trace radii add several points with a distance of approximately 0.1 to 0.5nm When you zoom out again it should look somewhat round. Don’t worry, depending of the complexity of your image, this might take a while…
Another hint: Check theMeasurementstab of the Path window for the length of your track. So you get a first rough idea of the needed flight time.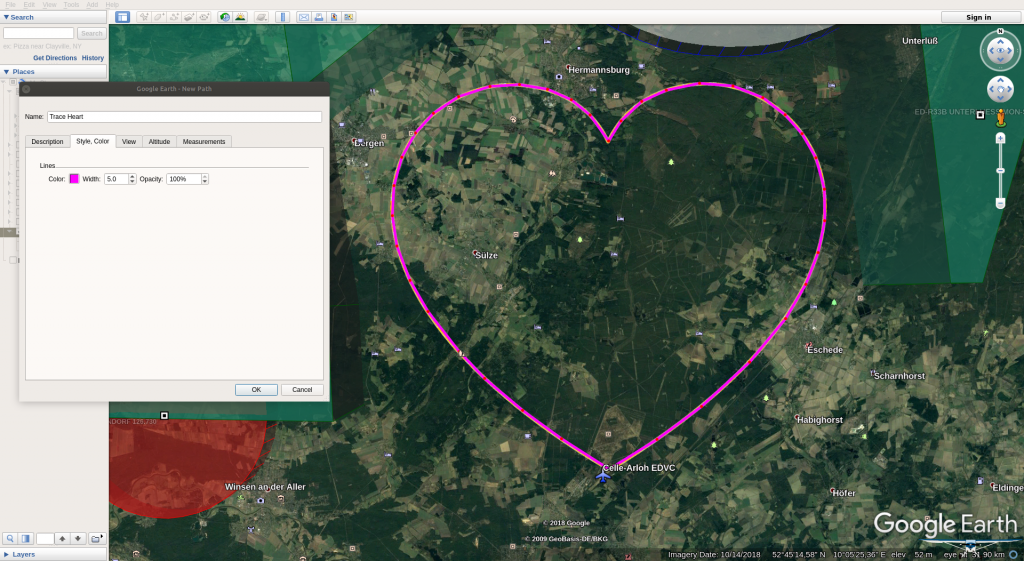
Overlay Image traced with a Path (click to enlarge)
- After you are done with all the tracing, close the Path window with OK.
- Last step here is to export the trace so we can read it with our GPS. Do a right click on the trace in the
Placestap and selectSave Place as...and save it to your disk as KML file.
-

Step 3: Import the trace into our navigation app
If your navigation app supports the import of KML files, you are lucky. You can skip right to step 3b.
As I fly with SkyDemon, I need to convert my KML file into GPX first. GPX is a genuine file type meant to share routes and tracks. It can be imported by most navigational systems.
Step 3a: Convert the KML trace file into a GPX route
For the conversion I use gpsies.com. Just upload the KML trace file select GPX Route in the Track filed. Than hit convert and save the resulting GPX file. At least for SkyDemon it seems to be important that the GPX file only contains one route.
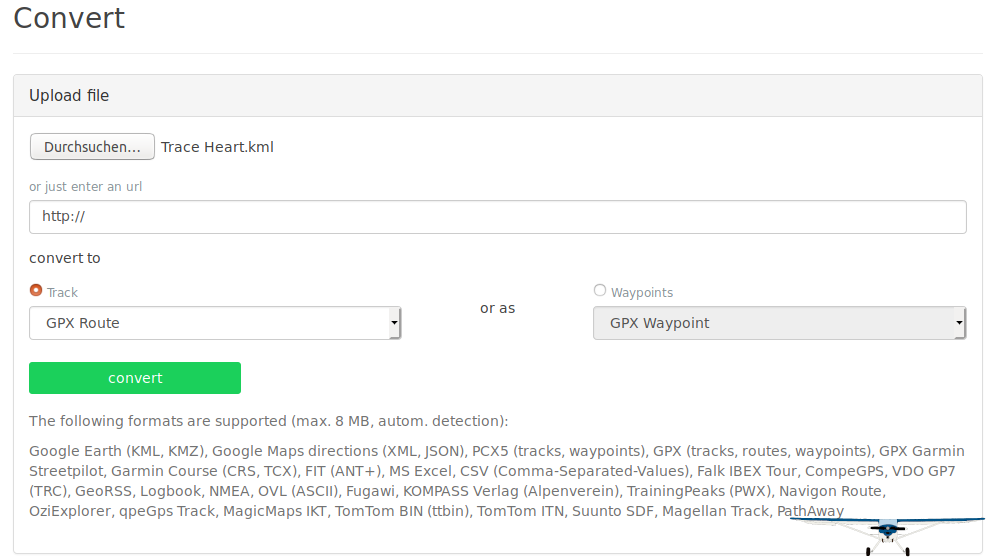
Convert the KML trace to a GPX route
Step 3b: Import the trace into our navigation app
In this section I use SkyDemon on PC. If you prefer another navigation app consult its handbook on how to import GPX files and proceed accordingly.
- Open SkyDemon and click
Route>Open... - Click
Open from a different location or with a different file typefrom the bottom left of the Open window. - Select the previously created GPX file. Depending on the amount of waypoints it might take several minutes to load. During that time it looks like SkyDemon has crashed but it is still working. The only thing here is that it is just not awfully efficient with files containing several hundred waypoints.
- Now you can select
Route>Save as...and save it as a SkyDemon flightplan file like every other flight. This way SkyDemon automatically puts a copy into its cloud and you are able to access it from your mobile device, too.
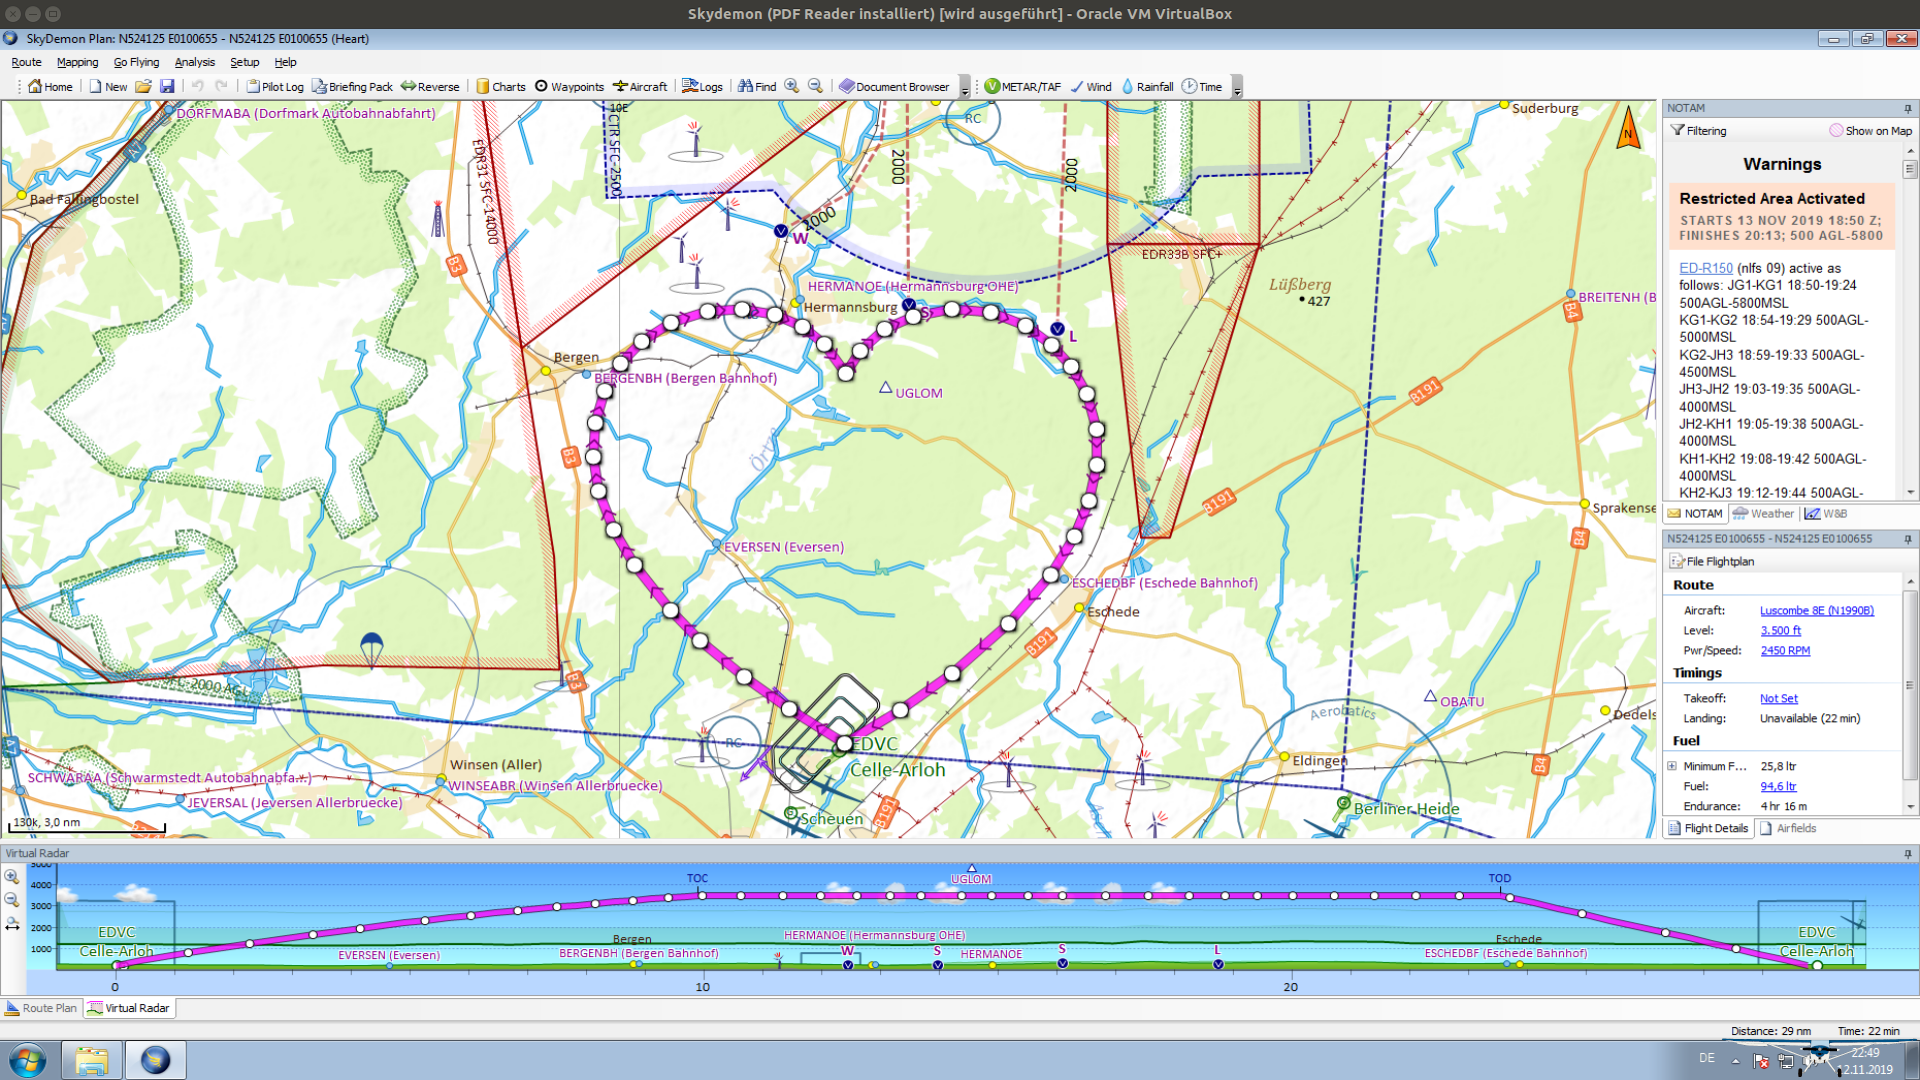
Finished Flightplan in SkyDemon (click to enlarge)
Step 4: Fly it!
DISCLAIMER: I am no flight instructor or what so ever. I am just a private pilot enjoying being in the air. Everything written in this paragraph comes from my personnel experience and I am willing to share it. For professional advise, consult a flight instructor, preferably with aerobatic experience!
Next step is to fly what we have just planned. You should be familiar with steep turns and different flying speeds. It makes sense that you want to slow down for tight turns in order to keep the turn radius small. On the other hand you still need to consider the additional load factor and higher angle of attack of a steep turn and therefore the higher stall speed. You may want to familiarize yourself with the art of flying canyon turns.
When you follow your planned route, you need to develop a feeling for the lack of your GPS while turning and the required bank angle for a specific turn radius. SkyDemon for example refreshes your position and track about every second. So when you do a steep turn like at the top center of the heart, you see that SkyDemon’s displayed track lacks several degrees behind your actual track. The only way is to judge by landmarks when to stop turning.
Treat the whole flight as ground reference maneuvers. You try to fly a predefined track above the ground and no arbitrary heading. So remember, when you turn from a tailwind into a headwind, start with a steeper bank angle and shallow it out. When start with a headwind and turn into a tailwind, start sallow and get steeper. A good training for this is doing S-turns like in your private pilot training.
But I like to give you one more advice. As you try to follow your course as close as possible, there will be a strong temptation to look on you GPS. But do remember, you are still flying VFR and you must look outside! Straight sections or relatively large turns with a constant turn rate are pretty useful to concentrate on traffic scanning as you don’t need that much resources for staying on course.
What you also want to consider is your takeoff weight. First off all, I do not recommend taking a passenger for the ride. You will do more or less erratic maneuvers and everybody else in the plane might feel sick pretty soon. If you carry passengers anyway, check the FARs for carrying passengers on aerobatic flights.
You also want to limit the amount of fuel you carry. A lighter airplane is more agile and has a lower stall speed. On the other hand keep in mid that you probably do more power changes and that you do not fly as close to the most efficient power setting as in normal cruise. I recommend to carry about 20% more fuel then you calculated for the distance.
If you want to do ADS-B skywriting, select an altitude that is covered by ground receivers. In most of Europe and North America this is probably the case above 2000ft AGL. In more rural areas you may need to climb higher. Maybe conduct a couple of test flights in the area first and check whether your preferred tracking platform has recorded your flight properly. For every tracking website the coverage is slightly different and it varies by time. Oh and yeah, turn your transponder on!
Step 5: Share it
This step depends on whether you do ADS-B Skywriting or GPS Skywriting. If you want to do ADS-B Skywriting, you might want to notify people before the flight so that they can see the action unfold.
Step 5a: Sharing a GPS track
Anyway, once you have return to your home airfield it is time to check the results. I wont go deeper into how to retrieve a GPX file or similar from your GPS as this process varies with different vendors and it is usually covered in their manual. Anyway, once you have retrieved your file I recommend that you convert it into an image before sharing. That is because you can’t assume that everybody has fitting software on his computer to open your GPS track file but also they might not want to spend the time for this. So in this section we will create a map image showing you track.
- Open Google Earth again. Then click
File>Open.... At the bottom the the Open window, you see the filedFiles of type. SelectGpshere and browse to your GPX file and open it.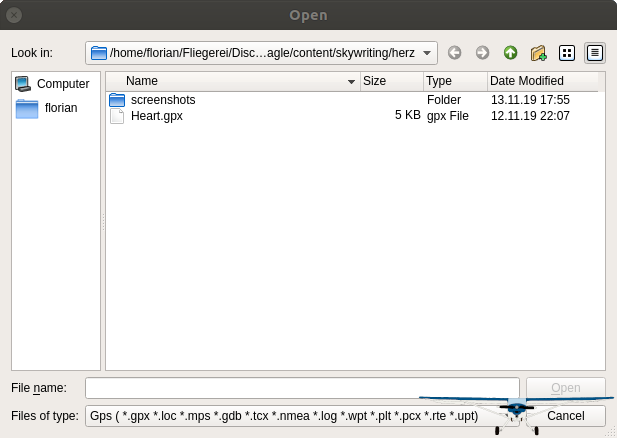
Open a GPX file
-
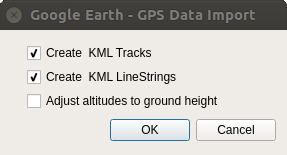
GPS Data Import
In the “GPS Data Import” windows tick
Create KML Line Stringat least. This assures, that Google Earth will draw a continuous line instead of just showing you each point your GPS has saved. -
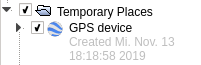
Imported GPS device
Now you can see, that a “GPS device” has appeared in the Temporary Places folder of the Places tab. All data from you GPX file is now stored inside here.
- Next step is to adjust the map in the way we like to share it. You might want to turn on the airspaces we imported during the planning phase to enhance the map.
- When you are happy with what you see, it is time to export the image. Therefore click
File>Save>Save Image...and you see that a new toolbar has appeared at the top. There you can give your image the final touches and then save it to your disk. - Continue with Step 5c.
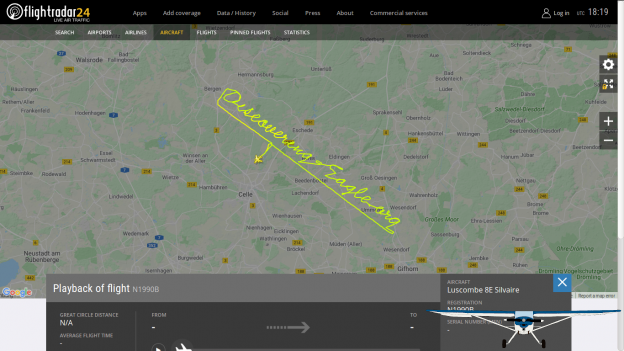
Step 5b: Export the flight from Flightradar24
If you used your ADS-B out transponder during the flight, you can also get an image from ADS-B tracking sites like Flightradar24. But first we have to find our flight. Therefore you can use the following link and replace your registration in it. It doesn’t matter if you write it with or without the hyphens or in upper or lower case.
https://www.flightradar24.com/data/aircraft/[your_registration_goes_here]
Now you get a list of the recent flights of your aircraft and when you click the “Play” button next to one you can see this flight on a map.
Now just make a screenshot of the map and save it to your disk.
Step 5c: Upload your image to social media
Last but not least we need to finally share the image on social media. Depending on the platform you like to use, the process differs. So I wont get deeper into it. If you got your flight tracked by a tracking side, you may want to include a link to the flight.
Congratulations, you are done!
Download
Here you find a ZIP file containing all the files that we used or produced during this tutorial.
 Heart.png
- Heart_Overlay.kml
- Heart_Trace.kml
- Heart.gpx
- Heart.flightplan